If you're trying to figure out how to secure Graco 4Ever DLX with seat belt only no LATCH, the short answer is: route the vehicle seat belt through the correct belt path for your child's mode (rear-facing, forward-facing, or harnessed booster), engage the built-in SecureLock belt lock-off, lock the seat belt's retractor by pulling it all the way out, push the car seat down with your body weight, and feed the slack back into the retractor. When properly installed, the 4Ever DLX should move less than 1 inch side-to-side or front-to-back at the belt path. This guide walks through every step for 2026 vehicles.
Many parents reach this point because their vehicle's lower LATCH anchors are weight-limited, unavailable in the center seat, or already occupied by another child seat. Good news: seat belt installation is just as safe as LATCH—the National Highway Traffic Safety Administration and Graco both confirm there is no safety advantage to one method over the other, provided the install is tight.

When You Should Use Seat Belt Instead of LATCH
Top Picks

Knowing why you're choosing seat belt only helps confirm you're making the right call. The most common reasons in 2026 model-year vehicles include:
- Combined child + seat weight exceeds 65 lb. Graco's published LATCH weight limit on the 4Ever DLX is 45 lb rear-facing and 40 lb forward-facing (child weight only). Once your child plus the seat's weight passes the lower-anchor limit—roughly 22 lb forward-facing for a typical 4Ever DLX—you must switch to seat belt.
- Center seat install. Most vehicles don't allow borrowing LATCH anchors from outboard positions for a center install. The seat belt is your only path.
- Three across. If you're installing three car seats in a row, you'll almost always run out of LATCH anchors and need seat belt installations.
- Vehicle doesn't have lower anchors. Some older vehicles, third-row middle seats, and pickup-truck jump seats simply lack lower anchors.
- Booster mode. Once your child rides as a high-back or backless booster, the vehicle seat belt restrains the child directly—the LATCH belt only stabilizes the booster shell when unoccupied.
If any of these apply, how to secure Graco 4Ever DLX with seat belt only no LATCH becomes the correct procedure, not a workaround.
Before You Start: Pre-Installation Checklist
Pull out the printed manual that came with your seat (or download the 2026 revision from Graco's site) and confirm these basics before you touch the seat belt:
- Read your vehicle owner's manual section on child restraint installation. It tells you whether your seat belt switches to automatic lock mode when fully extended (most do), whether the seat belt is the kind with a switchable retractor, and which seating positions are approved for child seats.
- Choose the correct mode: rear-facing (birth–40+ lb), forward-facing with 5-point harness (22–65 lb), high-back booster (40–100 lb), or backless booster (40–120 lb).
- Set the recline angle. The 4Ever DLX has a 6-position recline; positions 4–6 are for rear-facing, positions 1–3 for forward-facing and booster modes. Confirm the level line on the side matches the ground when the car is on a flat surface.
- Remove any aftermarket seat protectors, towels, or pool noodles that aren't approved by Graco—these can interfere with proper installation and void the warranty.
- Locate the correct belt path for your mode. Rear-facing uses the lower belt path with the BLUE label; forward-facing uses the upper belt path with the RED label. Booster mode doesn't use a belt path at all.
Step-by-Step: Seat Belt Installation for Rear-Facing Mode
This is the most common installation parents struggle with because the rear-facing belt path is buried under the cushion. Take your time.

- Recline first. Push the recline handle on the front of the base and set the seat to position 4, 5, or 6 depending on your child's age (newborns need the deepest recline).
- Place the seat rear-facing in your vehicle's chosen position, snug against the vehicle seatback.
- Open the rear-facing belt path. Lift the seat cushion or move the harness covers aside to expose the BLUE belt-path channel that runs left-to-right under the child's legs area.
- Thread the vehicle seat belt across the belt path, under both belt guides, and buckle it.
- Switch the retractor to automatic lock mode. Pull the shoulder portion of the seat belt out until it stops, then let it slowly retract. You should hear a ratcheting click—that's the lock engaging.
- Open the SecureLock belt lock-off on the 4Ever DLX (it's a plastic clamp located on the belt path) and route the lap portion of the belt through it.
- Press down on the seat firmly with your body weight—knee or palm—while pulling the shoulder belt toward the retractor to feed slack back in.
- Close the SecureLock clamp over the seat belt. This is the critical step many parents skip and is what eliminates the need for LATCH-style tensioning.
- Inch test. Grab the car seat at the belt path and tug forward and side-to-side. Movement at the belt path should be less than 1 inch in any direction.
Step-by-Step: Seat Belt Installation for Forward-Facing Mode
Forward-facing is mechanically similar but uses the upper (red) belt path and also requires the top tether.
- Recline to position 1, 2, or 3.
- Place the seat forward-facing against the vehicle seatback.
- Locate the RED forward-facing belt path behind the child's back. Open the back-rest panel if needed to expose it.
- Thread the vehicle lap-and-shoulder belt through the red belt guides on both sides and buckle it.
- Pull the shoulder belt all the way out to engage automatic lock mode and let it retract.
- Route the belt through the SecureLock clamp.
- Press your knee into the seat-back area, pull slack out toward the retractor, and close the lock-off.
- Attach the top tether to your vehicle's tether anchor (NOT the cargo hook—real tether anchors are labeled with the universal anchor icon). Tighten until the tether strap is snug with no slack.
- Perform the 1-inch test at the belt path.
Internal resources we recommend reading next
If you want a deeper dive into specific scenarios, check our complete LATCH installation walkthrough, our breakdown of seat belt vs LATCH safety differences, and our list of the most common car seat installation mistakes parents make.
The 5 Most Common Mistakes (and How to Fix Them)
- Forgetting to lock the retractor. Without the automatic lock engaged, normal driving forces will let the belt slowly pay out, loosening your install. Pull the belt all the way out, every time.
- Skipping the SecureLock. The clamp is what holds tension while you let go of the seat. Without it, you'll never get under the 1-inch movement threshold.
- Wrong belt path. Using the forward-facing (red) path for rear-facing is one of the most dangerous installation errors because the seat can rotate in a crash. Match the color to your mode.
- Twisted belt. A twisted seat belt reduces its crash performance by concentrating force on a smaller area. Straighten any twists before locking the SecureLock.
- Recline angle wrong. Too upright in rear-facing mode = airway risk for newborns. Too reclined in forward-facing = head excursion in a crash. Match the level indicator on the seat shell to the ground.
How to Test Your Install
After locking everything down, perform these three checks in order:
The 1-inch test. Grip the seat at the belt path with one hand and tug firmly forward, then side-to-side. Both directions should show less than 1 inch of movement. If either direction moves more, the belt isn't tight enough—reopen the SecureLock, press down harder, and re-feed slack.
The harness pinch test (for harnessed mode). Buckle your child in, tighten the harness, and try to pinch the harness strap at the collarbone. If you can pinch a horizontal fold of webbing between your fingers, the harness is too loose.
The drive-and-recheck. After your first 15-minute drive, get out and repeat the 1-inch test. Belts sometimes settle, and you may need to retighten once.
Stroller and Travel System Pairings
The 4Ever DLX is a stationary car seat—it doesn't click into a stroller. If you have a newborn (under 22 lb) and want a full travel system, parents often pair the 4Ever DLX with an infant bucket seat that snaps into a stroller frame for the first 9–12 months, then transition the child into the 4Ever DLX for the rest of their car-seat life. Here are a couple of stroller options frequently bought alongside the 4Ever DLX:
| Product | Best For | Weight Limit | Fold Style |
|---|---|---|---|
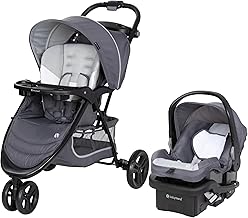
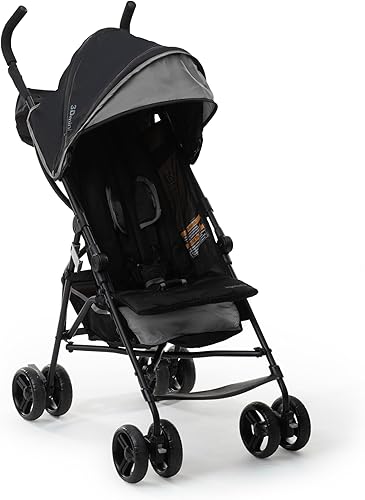
| Baby Trend EZ Ride Travel System | Newborn–toddler with infant car seat included | 50 lb | Standard fold |
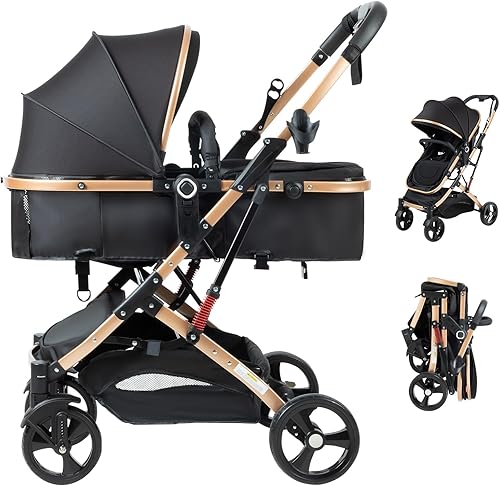
| KOOLABABY Reversible Foldable Stroller | Parent-facing toddlers | 55 lb | One-hand reversible fold |
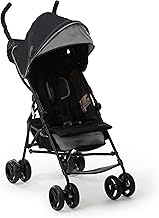
| Ingenuity 3D Mini Lightweight Stroller | Travel, errands, secondary stroller | 50 lb | Ultra-compact umbrella |
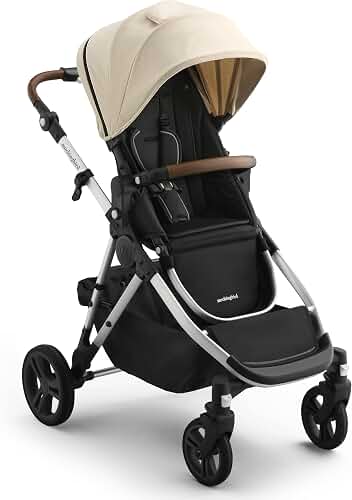
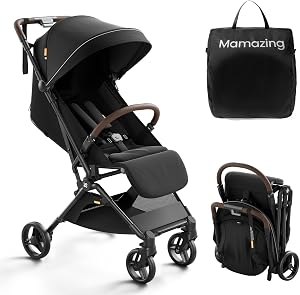
Baby Trend EZ Ride Travel System with Infant Car Seat
If your baby is still in the newborn phase and won't be ready for the 4Ever DLX rear-facing harness for several months, the Baby Trend EZ Ride travel system gives you an infant car seat that clicks into the stroller frame—ideal for sleeping babies you don't want to wake. Pair it with the 4Ever DLX as a long-term car seat once your child outgrows the infant bucket. Baby Trend Stroller and EZ-Lift Infant Car Seat.
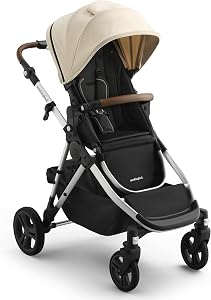
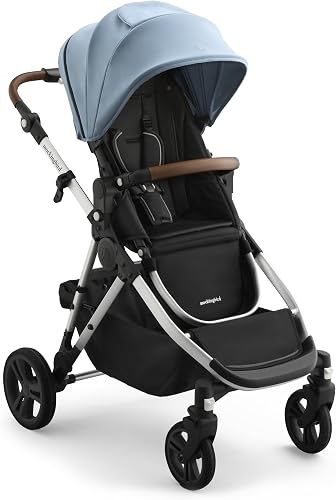
KOOLABABY Reversible Foldable Baby Stroller
For toddlers who've graduated out of the infant bucket and ride exclusively in the 4Ever DLX in the car, a reversible-handle stroller like KOOLABABY lets your child face you or the world. The one-hand fold is useful when you've got the 4Ever DLX-secured car already loaded and need to free your hands. KOOLABABY Reversible Foldable Baby Stroller.
Ingenuity 3D Mini Lightweight Compact-Fold Stroller
Families that fly often or keep a secondary stroller in the trunk love the Ingenuity 3D Mini because it folds small enough to gate-check or stash next to the 4Ever DLX. It isn't a travel system—use it for ages 6 months and up once your toddler can sit unassisted. Ingenuity 3D Mini Convenience Stroller.
For more options at every stage, see our 2026 stroller guide for Graco car seat owners.
Frequently Asked Questions
Is it safe to install the Graco 4Ever DLX with only the seat belt and no LATCH?
Yes. Both Graco and NHTSA confirm that seat belt installation is equally safe as LATCH when done correctly. The key is engaging the seat belt's automatic lock retractor, using the SecureLock belt clamp, and verifying less than 1 inch of movement at the belt path. In fact, once your child exceeds the LATCH weight limit, seat belt becomes the required method.
What is the SecureLock belt lock-off on the Graco 4Ever DLX and where is it?
SecureLock is a hinged plastic clamp built into both the rear-facing and forward-facing belt paths. It holds the lap portion of the seat belt in place after you've tensioned the install, so the belt can't slowly pay slack back out while you drive. You'll find it as a small flap on the side of each belt path—open it, route the belt under it, then snap it closed.
Do I still need the top tether when installing forward-facing with seat belt only?
Absolutely yes. The top tether is required for all forward-facing harness installations regardless of whether you used LATCH or seat belt. It reduces head excursion in a frontal crash by up to 6 inches. Always attach the tether to a real vehicle tether anchor (look for the universal anchor icon), never a cargo hook.
How tight is tight enough for a seat belt only install?
The industry standard is the 1-inch test: grab the car seat at the belt path and pull. If it moves more than 1 inch forward or side-to-side at the belt path, it's too loose. Movement at the top of the seat is normal and doesn't matter—only the belt path counts.
What if my vehicle's seat belt doesn't have an automatic lock retractor?
A handful of older vehicles and some commercial vehicles use only emergency-locking retractors. In that case, you'll need a locking clip (the H-shaped metal clip that came in your 4Ever DLX accessories bag) to keep the lap portion locked. Check your vehicle owner's manual for the exact procedure—most 2026 model-year cars handle this automatically.
Can I switch back to LATCH once my child is smaller again, like if I have a second baby use the seat?
Yes. The 4Ever DLX is designed for both methods at any time during its life, as long as the child meets the LATCH weight limits (typically up to 45 lb rear-facing or until child weight + seat weight exceeds 65 lb). Just remove the seat belt install completely and reinstall using LATCH per the manual—don't try to use both methods at once.
Should I get my seat belt only install checked by a CPST?
Highly recommended, especially the first time. Certified Child Passenger Safety Technicians offer free or low-cost installation checks at fire stations, hospitals, and police departments across the country. Search the NHTSA inspection-station locator for one near you. Most appointments take 20–30 minutes and dramatically reduce the chance of a misuse error.
Final Safety Reminder
Knowing how to secure Graco 4Ever DLX with seat belt only no LATCH is just step one—the install also needs to match your child's mode, your vehicle's seat belt type, and the correct recline angle for their age and weight. Recheck the install monthly, after any time the seat is removed, and after the first long drive. A properly seat-belt-installed 4Ever DLX is every bit as protective as a LATCH install—done right, it's the safest seat on the market for your child from infancy through booster years.
Key Takeaways
- Choosing the right how to secure graco 4ever dlx with seat belt only no latch means matching the key features to your specific needs and budget
- Read real customer reviews and check the return policy before you commit
- Also covers: graco 4ever dlx seatbelt install
- Also covers: graco 4ever no latch installation
- Also covers: seat belt only car seat install graco
- Compare value across models — the priciest option is not always the best fit